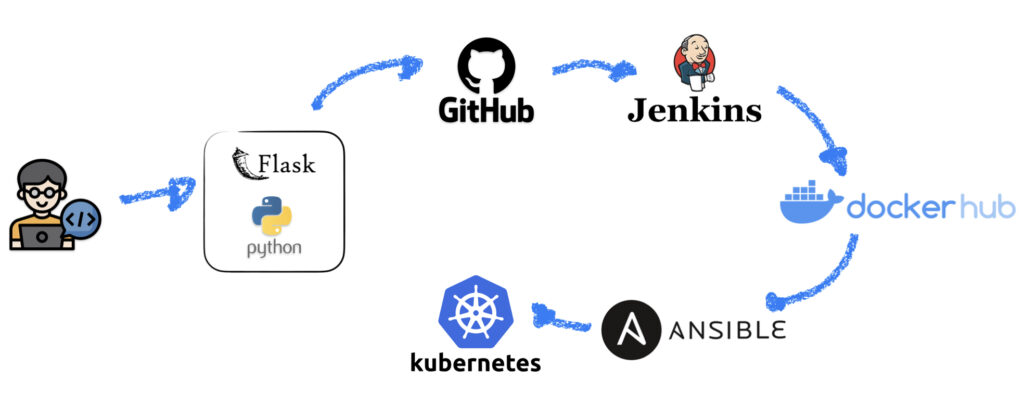
In this post, I will show how to deploy a Python + Flask app to a Kubernetes cluster using Jenkins + Ansible from a GitHub repository.
Scenario
This is a real-world use case that I had to do on my job, the App is a self-service portal where the users can log in with their Active Directory credentials and update their telephone number, this was needed because we have automatically generated the Email Signature for all the users and on this signature, there is a field displaying the telephone number and as we have more than 4000 email users we thought that the best we could do is to let them update that themselves.
So I thought I could use this case to build a complete DevOps project using GitHub as the repository, Python and Flask as the programming language, Docker and Kubernetes to serve the application, and finally, Jenkins (with Ansible participation) as the CI/CD orchestrator.
Project Parts
As this project is going to be long to describe I will separate it into parts as follows:
Part 1 – Servers and Network Configuration and App deploy as a Docker Image
Part 2 – Kubernetes Cluster configuration, Docker Image push to Docker Hub and App deploy to Kubernetes
Part 3 – Jenkins Pipeline
Pre-requisite
The only part that I won’t cover is the Active Directory installation and configuration part, so, I will assume that there is a healthy AD Domain up and running.
VMs Servers
I will be using VirtualBox and Vagrant to deploy the Linux VMs that I going to use, all of them running Ubuntu Server 20.04, here are the number of VMs and their roles on this project:
- Windows Server – Development machine and Active Directory Domain
- Hostname: AD2016
- IP: 10.200.200.10
- AD Domain: contoso.local
- Docker – Dev and Test machine.
- Hostname: server01
- IP: 10.200.200.21
- Jenkins VM
- Hostname: server02
- IP: 10.200.200.22
- Jenkins Node
- Hostname: server03
- IP: 10.200.200.23
- Kubernetes – Control Plane
- Hostname: kubemaster
- IP: 10.200.200.31
- Kubernetes – Worker Node 1
- Hostname: kubenode01
- IP: 10.200.200.32
- Kubernetes – Worker Node 2
- Hostname: kubenode02
- IP: 10.200.200.33
VirtualBox Configuration
I have separated the VMs on a different network so I’ve created this NAT Network with the IP configuration that I’ll be using.

With this configuration, the VMs will be isolated from the physical network by default, they will be able to talk to each other and have access to the internet.
Keep note of the name of the NAT Network that you create here, we will use that on the Vagrantfile script.
DNS Configuration
Initially, these are the DNS entries needed, basically, just a bunch of “A” records to be able to resolve hostnames without messing with host files manually.

IP Configuration
After the Linux VMs are deployed through Vagrant, we have to adjust some IP settings, this is because Vagrant will configure two NIC Interfaces, one NAT, the default one, and the NAT that we will be using, so basically, we have to remove the default NAT, and set Gateway and DNS to the other interface, so on the VirtualBox Network Configuration console, the Linux VMs should look like this:


And, inside the VM, the Netplan config file (/etc/netplan/50-vagrant.yaml) should be changed from this:
---
network:
  version: 2
  renderer: networkd
  ethernets:
    enp0s8:
      addresses:
      - 10.200.200.21/24
To this:
---
network:
  version: 2
  renderer: networkd
  ethernets:
    enp0s8:
      addresses:
      - 10.200.200.21/24
      gateway4: 10.200.200.2
      nameservers:
        addresses:
        - 10.200.200.10
        search:
        - contoso.local
Important: the file name inside netplan folder maybe have a different name on your config, as well as the ethernet name, pay attention to that.
Vagrantfile – Docker and Jenkins
I will use two different Vagrant scripts, this is because to deploy the Kubernetes Cluster I will pre-configure some packages needed on the Vagrantfile.
So for the Docker, Jenkins and Jenkins Node VMs, this is the Vagrantfile:
# Define how many VMs you want to be provisioned
SERVERS = 3

# Specify the Network and which IP to be configured
IP_NETWORK = "10.200.200."
IP_START = 20

Vagrant.configure("2") do |config|
  config.vm.box = "ubuntu/focal64"

  (1..SERVERS).each do |i|
    config.vm.define "server0#{i}" do |server|
      server.vm.network :private_network, ip: IP_NETWORK + "#{IP_START + i}", virtualbox__intnet: "redenat"
      server.vm.hostname = "server0#{i}"

      server.vm.provider :virtualbox do |vb|
        vb.customize ["modifyvm", :id, "--memory", 2048]
        vb.customize ["modifyvm", :id, "--cpus", 4]
        vb.customize ["modifyvm", :id, "--name", "server0#{i}"]
      end

      server.vm.provision "shell", inline: <<-'SHELL'
        sed -i 's/^#* *\(PermitRootLogin\)\(.*\)$/\1 yes/' /etc/ssh/sshd_config
        sed -i 's/^#* *\(PasswordAuthentication\)\(.*\)$/\1 yes/' /etc/ssh/sshd_config
        systemctl restart sshd.service
        echo -e "vagrant\nvagrant" | (passwd vagrant)
        echo -e "root\nroot" | (passwd root)
        apt-get update
      SHELL
    end
  end
end
Vagrantfile – Kubernetes Cluster
This is basically the same script as before, but here I am manually defining all the three VMs, and also, already installing Docker, Kubeadm, Kubelet, and Kubectl.
 Vagrant.configure("2") do |config|
  config.vm.define "kubemaster" do |kubemaster|
    kubemaster.vm.box = "ubuntu/focal64"
    kubemaster.vm.network "private_network", ip: "10.200.200.31", virtualbox__intnet: "redenat"
    kubemaster.vm.hostname = 'kubemaster'

    kubemaster.vm.provider :virtualbox do |v1|
      v1.customize ["modifyvm", :id, "--memory", 4096]
      v1.customize ["modifyvm", :id, "--cpus", 4]
      v1.customize ["modifyvm", :id, "--name", "kubemaster"]
    end

    kubemaster.vm.provision "shell", inline: <<-'SHELL'
      sed -i -e 's/#DNS=/DNS=10.200.200.10/' /etc/systemd/resolved.conf
      sed -i -e 's/#Domains=/Domains=contoso.local/' /etc/systemd/resolved.conf
      service systemd-resolved restart
      sed -i 's/^#* *\(PermitRootLogin\)\(.*\)$/\1 yes/' /etc/ssh/sshd_config
      sed -i 's/^#* *\(PasswordAuthentication\)\(.*\)$/\1 yes/' /etc/ssh/sshd_config
      systemctl restart sshd.service
      echo -e "vagrant\nvagrant" | (passwd vagrant)
      echo -e "root\nroot" | (passwd root)
      curl -fsSL https://get.docker.com | bash
      curl -fsSLo /usr/share/keyrings/kubernetes-archive-keyring.gpg https://packages.cloud.google.com/apt/doc/apt-key.gpg
      echo "deb [signed-by=/usr/share/keyrings/kubernetes-archive-keyring.gpg] https://apt.kubernetes.io/ kubernetes-xenial main" | sudo tee /etc/apt/sources.list.d/kubernetes.list
      apt-get update
      apt-get install -y kubelet kubeadm kubectl
      apt-mark hold kubelet kubeadm kubectl
      rm /etc/containerd/config.toml
      systemctl restart containerd
    SHELL
  end

  config.vm.define "kubenode01" do |kubenode01|
    kubenode01.vm.box = "ubuntu/focal64"
    kubenode01.vm.network "private_network", ip: "10.200.200.32", virtualbox__intnet: "redenat"
    kubenode01.vm.hostname = 'kubenode01'

    kubenode01.vm.provider :virtualbox do |v2|
      v2.customize ["modifyvm", :id, "--memory", 3072]
      v2.customize ["modifyvm", :id, "--cpus", 4]
      v2.customize ["modifyvm", :id, "--name", "kubenode01"]
    end

    kubenode01.vm.provision "shell", inline: <<-'SHELL'
      sed -i -e 's/#DNS=/DNS=10.200.200.10/' /etc/systemd/resolved.conf
      sed -i -e 's/#Domains=/Domains=contoso.local/' /etc/systemd/resolved.conf
      service systemd-resolved restart
      sed -i 's/^#* *\(PermitRootLogin\)\(.*\)$/\1 yes/' /etc/ssh/sshd_config
      sed -i 's/^#* *\(PasswordAuthentication\)\(.*\)$/\1 yes/' /etc/ssh/sshd_config
      systemctl restart sshd.service
      echo -e "vagrant\nvagrant" | (passwd vagrant)
      echo -e "root\nroot" | (passwd root)
      curl -fsSL https://get.docker.com | bash
      curl -fsSLo /usr/share/keyrings/kubernetes-archive-keyring.gpg https://packages.cloud.google.com/apt/doc/apt-key.gpg
      echo "deb [signed-by=/usr/share/keyrings/kubernetes-archive-keyring.gpg] https://apt.kubernetes.io/ kubernetes-xenial main" | sudo tee /etc/apt/sources.list.d/kubernetes.list
      apt-get update
      apt-get install -y kubelet kubeadm kubectl
      apt-mark hold kubelet kubeadm kubectl
      rm /etc/containerd/config.toml
      systemctl restart containerd
    SHELL
  end

  config.vm.define "kubenode02" do |kubenode02|
    kubenode02.vm.box = "ubuntu/focal64"
    kubenode02.vm.network "private_network", ip: "10.200.200.33", virtualbox__intnet: "redenat"
    kubenode02.vm.hostname = 'kubenode02'

    kubenode02.vm.provider :virtualbox do |v3|
      v3.customize ["modifyvm", :id, "--memory", 3072]
      v3.customize ["modifyvm", :id, "--cpus", 4]
      v3.customize ["modifyvm", :id, "--name", "kubenode02"]
    end

    kubenode02.vm.provision "shell", inline: <<-'SHELL'
      sed -i -e 's/#DNS=/DNS=10.200.200.10/' /etc/systemd/resolved.conf
      sed -i -e 's/#Domains=/Domains=contoso.local/' /etc/systemd/resolved.conf
      service systemd-resolved restart
      sed -i 's/^#* *\(PermitRootLogin\)\(.*\)$/\1 yes/' /etc/ssh/sshd_config
      sed -i 's/^#* *\(PasswordAuthentication\)\(.*\)$/\1 yes/' /etc/ssh/sshd_config
      systemctl restart sshd.service
      echo -e "vagrant\nvagrant" | (passwd vagrant)
      echo -e "root\nroot" | (passwd root)
      curl -fsSL https://get.docker.com | bash
      curl -fsSLo /usr/share/keyrings/kubernetes-archive-keyring.gpg https://packages.cloud.google.com/apt/doc/apt-key.gpg
      echo "deb [signed-by=/usr/share/keyrings/kubernetes-archive-keyring.gpg] https://apt.kubernetes.io/ kubernetes-xenial main" | sudo tee /etc/apt/sources.list.d/kubernetes.list
      apt-get update
      apt-get install -y kubelet kubeadm kubectl
      apt-mark hold kubelet kubeadm kubectl
      rm /etc/containerd/config.toml
      systemctl restart containerd
    SHELL
  end
end
If everything went well, here is what our VirtualBox should look like.

I like to take a snapshot of the Kubernetes VMs before installing the cluster, just to be safe.
Before continuing, be sure to do some connectivity tests between the VMs by ping each other.
The App
Please clone the following repository
https://github.com/roogiwara/ADUserSelfServicePortal
Explaining the code:
We will prompt for the user and password from login form and use the ldap3 library to see if that user can bind successfully to Active Directory, if yes we return a success message and redirect to the form that the user will enter the telephone number.
After the user is logged in, we will search for the user in the Active Directory tree and loop through the results, when the user is matched we modify the attribute telephoneNumber with the value provided in the form.
The variables needed for Service User, which is the account that is going to update the user’s attribute, DN path to search for, domain, and Domain Controller, all those variables will be passed via environment variables within Docker or Kubernetes.
To run the application directly from the VSCode, we need to set default values to the environment variables on the files tel_cadastro.py and tel_ad_ldap_auth.py, or the application will fail to start.

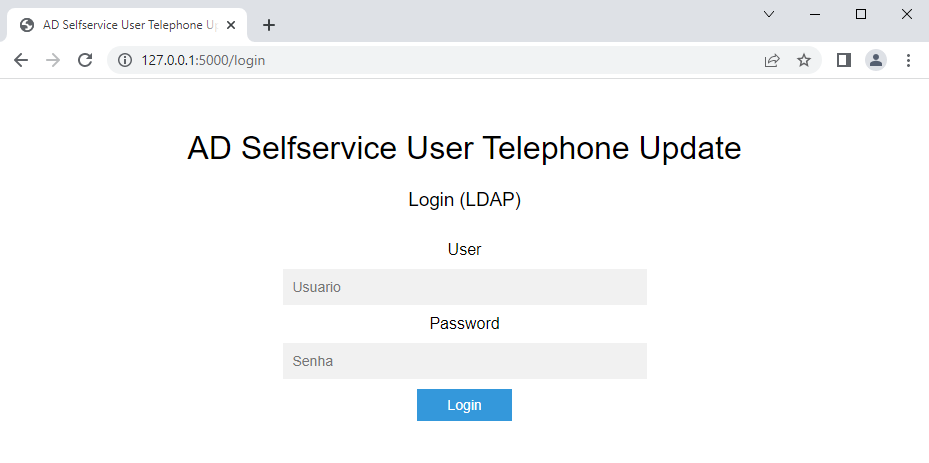
Start the tel_app.py and we should be able to access the login page:


Try to login with an Active Directory User and update its telephone number.
Note that I am using jQuery Validate plugin to match Brazil’s pattern, maybe you have to change that.

Ok, everything seems to be running fine, I will remove the default values for the environment variables for security reasons.

Now, let’s Dockerize it.
Dockerfile
First, we need to create a requirements.txt file to tell the packages we need to be installed.

Now, create a Dockerfile with the following contents.
FROM python:3.8.10
RUN mkdir /app
WORKDIR /app
ADD requirements.txt /app
COPY . /app
RUN pip install -r requirements.txt
RUN pip install ldap3
CMD ["gunicorn", "-w 4", "-b", "0.0.0.0:5000", "wsg:app"]
First, we are using the base Python image, next, creating and setting a working directory, copying all the files to that directory and installing the requirements and also the ldap3 library, and finally, running the Gunicorn command to start the application.
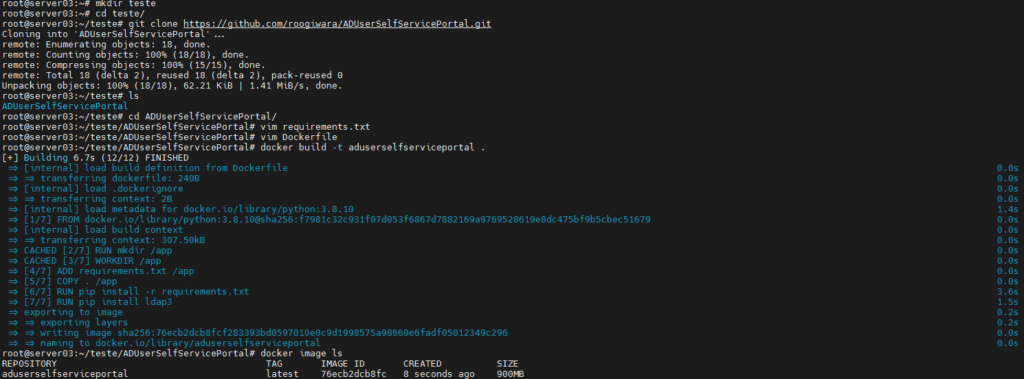
Now let’s build this image.
docker build -t adselfupdate .
And run passing the environment variables on the run command.
docker run -e NETBIOS=contoso -e ADFQDN=AD2016.contoso.local -e USER=service.account -e PASSWORD=WkIr4b4J9M0wOX3u -e BASEDN=DC=contoso,DC=local -d --name adselfupdate -p 5000:5000 adselfupdateAs I mentioned before, I am passing the values for the environment variables needed on our code, including the service account that have the permissions to change the user’s property.

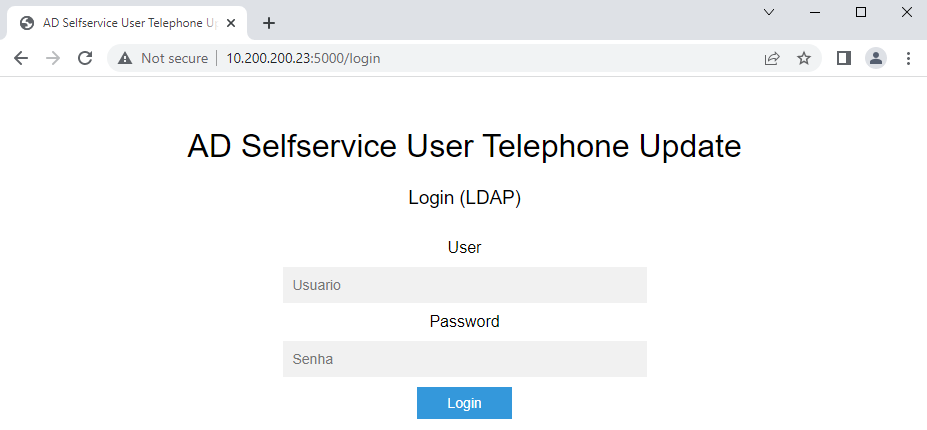
And test the application.

Everything seems to be running fine.
In the next post, I will Deploy the Kubernetes Cluster, and try to deploy the same application using manifests files.
Thanks for reading.

One response to “Real World DevOps CI/CD Python Project – Part 1”
[…] Part 1 – Here […]