Kubernetes Cluster
Following part 1 of our project, if you deployed all the VMs using the Vagrant Scripts that I used, it is going to be easy to configure our Kubernetes Cluster because the container runtime is already installed as well as the kubelet and kubeadm, so, to configure the cluster using kubeadm first run:
kubeadm init --pod-network-cidr 10.244.0.0/16 --apiserver-advertise-address=10.200.200.31

Now run the command presented as a regular user
mkdir -p $HOME/.kube
sudo cp -i /etc/kubernetes/admin.conf $HOME/.kube/config
sudo chown $(id -u):$(id -g) $HOME/.kube/config
Now copy the command to of kubeadm join to run on the nodes.

After running the kubeadm join on the nodes, you should see something like this:

Ok, the nodes are not ready because we still need a pod network, I will use Weave, run the command below on the control plane.
kubectl apply -f https://github.com/weaveworks/weave/releases/download/v2.8.1/weave-daemonset-k8s.yaml

After sometime all the nodes should appear as ready.
Now we are good.
To deploy our application we need to access our builded image that are still on our Docker dev/test server so we will push it to the Docker Hub to make it accessible everywhere.
Docker Hub
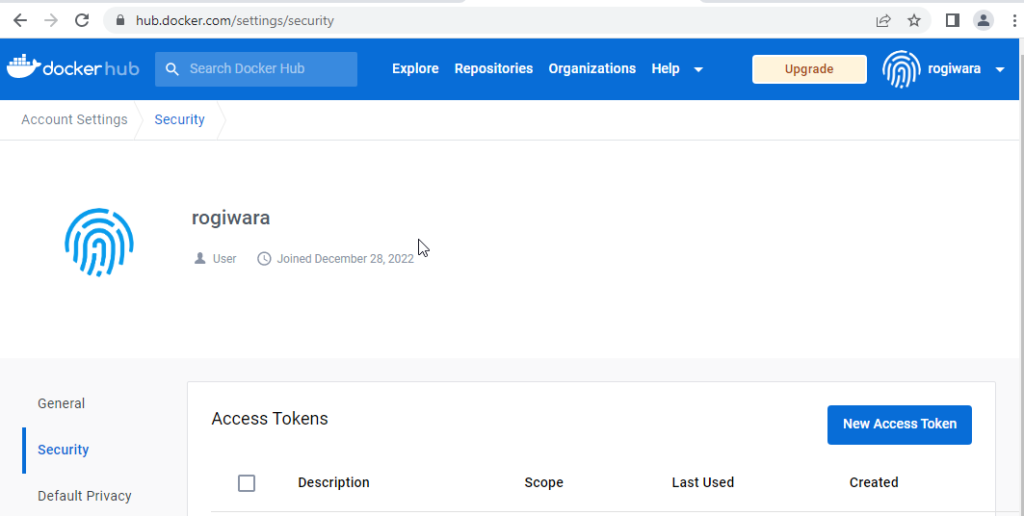
To push our previously built image to Docker Hub, create a New Access Token on the Docker Hub security settings page.

On the server that we built our image, run docker login, enter your docker hub account and then the new access token created before.

Now, tag the local image on the following format: <your account>/<repository name>:<version number> in my case:
docker tag aduserselfserviceportal rogiwara/adselfupdate:1.0.0
And now, push the image:
docker push rogiwara/adselfupdate:1.0.0

Ok, time to run this image on our Kubernetes cluster.
Kubernetes Deployment
I will create a new namespace for testing.
kubectl create namespace testingCreate a secret to store our service account password.
kubectl create secret generic ad-svc-account --from-literal=PASSWORD='WkIr4b4J9M0wOX3u' -n testing
Create a yaml file to deploy our app.
---
apiVersion: apps/v1
kind: Deployment
metadata:
  namespace: testing
  name: adselfupdate-deploy
  labels:
    app: adselfupdate-app
spec:
  replicas: 2
  selector:
    matchLabels:
      app: adselfupdate-app
  template:
    metadata:
      name: adselfupdate-pod
      labels:
        app: adselfupdate-app
    spec:
      containers:
      - name: adselfupdate-container
        image: rogiwara/adselfupdate:1.0.0
        env:
        - name: NETBIOS
          value: "contoso"
        - name: ADFQDN
          value: "AD2016.contoso.local"
        - name: USER
          value: "service.account"
        - name: BASEDN
          value: "DC=contoso,DC=local"
        envFrom:
        - secretRef:
            name: ad-svc-account
        ports:
        - containerPort: 5000
Apply the yaml file to create the deployment.

Now we have to expose the deployment by creating a service, create another yaml file containing the service definition.
apiVersion: v1
kind: Service
metadata:
  namespace: testing
  name: adselfupdate-service
spec:
  type: NodePort
  selector:
    app: adselfupdate-app
  ports:
    - port: 5000
      targetPort: 5000
      nodePort: 30001
Apply the yaml file and check if the service and app is working.


Alright, let’s test if the application is running as expected. The User01 has no telephone number.


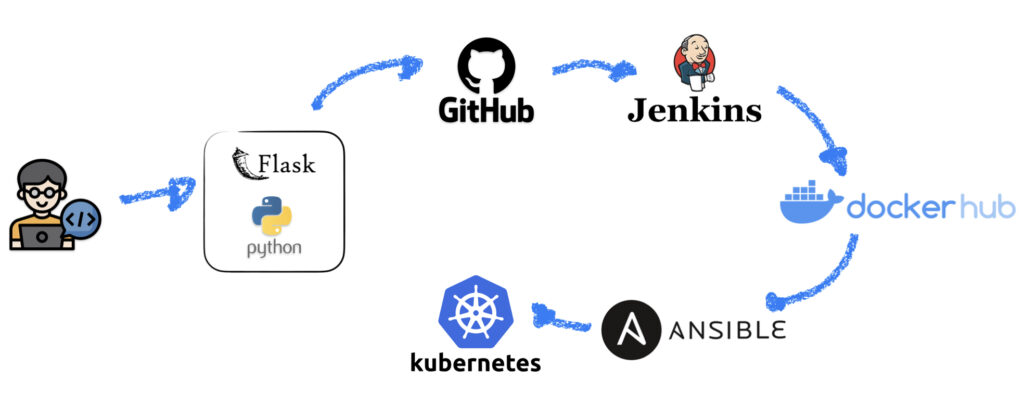
Ok, we confirmed that everything is working on our Kubernetes Cluster, we were able to login using our AD credentials and also update the telephone number field, on the last part of this project we will use Jenkins and Ansible to automate all the manual process we did so far.
Thanks for reading.
